Knitting Tutorial – How to work a Picot Bind Off
The Picot Bind Off has become my favorite finishing go to techniques for all kinds of knitted pieces. With it’s textured bumpy edge reminiscent of a string of pearls, it adds zing to even the simplest of knits.
In this step by step tutorial you will learn how to work a picot bind off from start to finish.
I initially wrote this tutorial for my Darlin’ Clementine Shawl Knitting Pattern which finishes up with a picot bind off, however, this process can be used to finish off any knitting project.
The picot bind off is basically a two step process. The first step is to cast on & bind off two new stitches which will form the “bump”. The second step is to bind off two existing stitches which will form the space between the bumps.
So grab your needles and let’s get started!
Having worked the last row of your pattern, which should be a wrong side row, you can now start your Picot Bind Off.
Cable Cast On
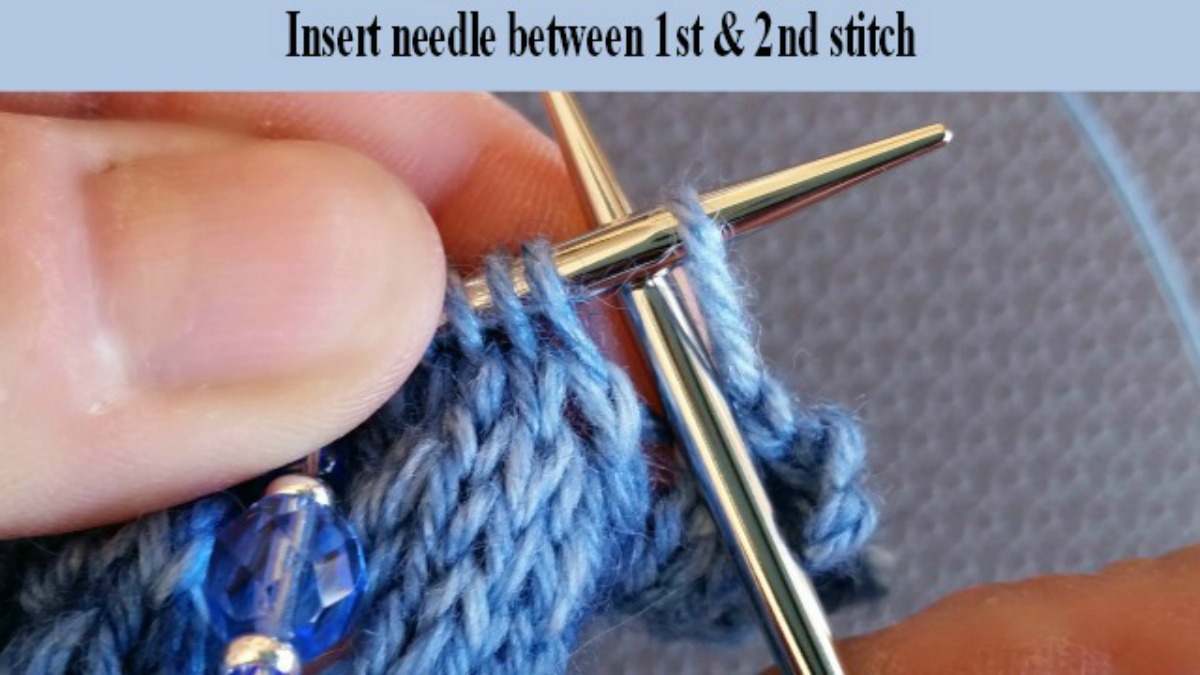
With your live stitches on your left needle, insert your right needle between the first and second stitch.
Lay your yarn over the needle as if you were going to knit.
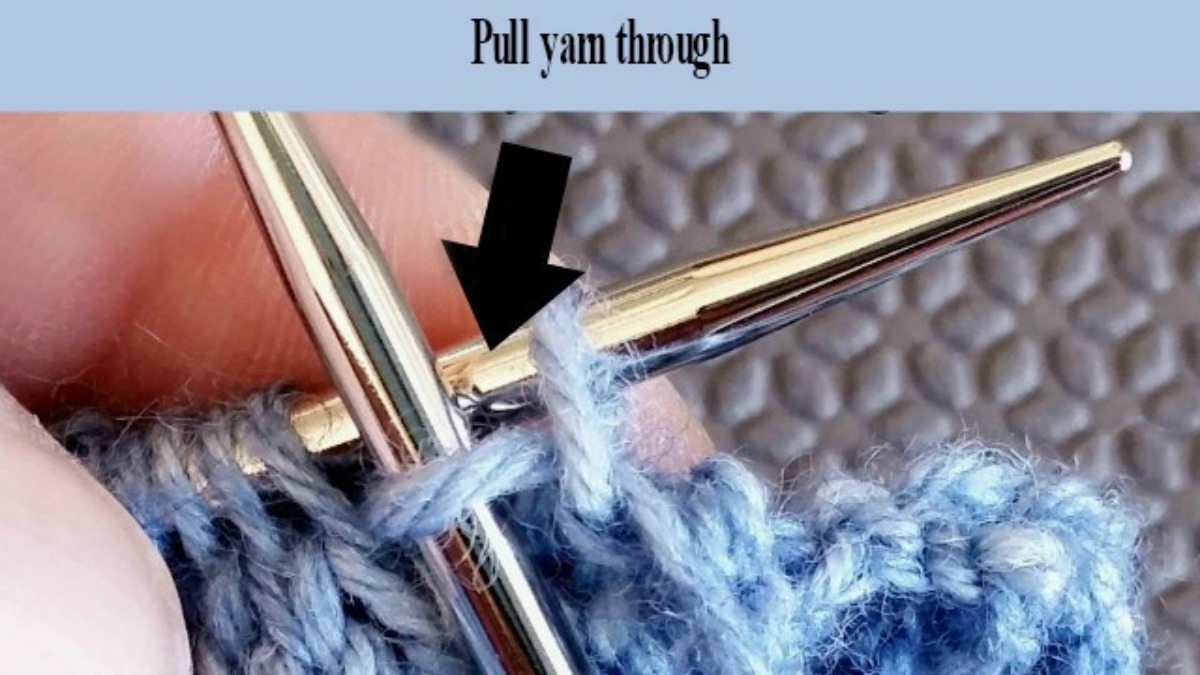
Pull that loop of yarn between & through the 2 stitches.
Continue to pull the loop until it is long enough to place on to the left needle.
Placing the loop on the left needle, repeat the process by casting on a second stitch between the first & second stitch on the left needle.
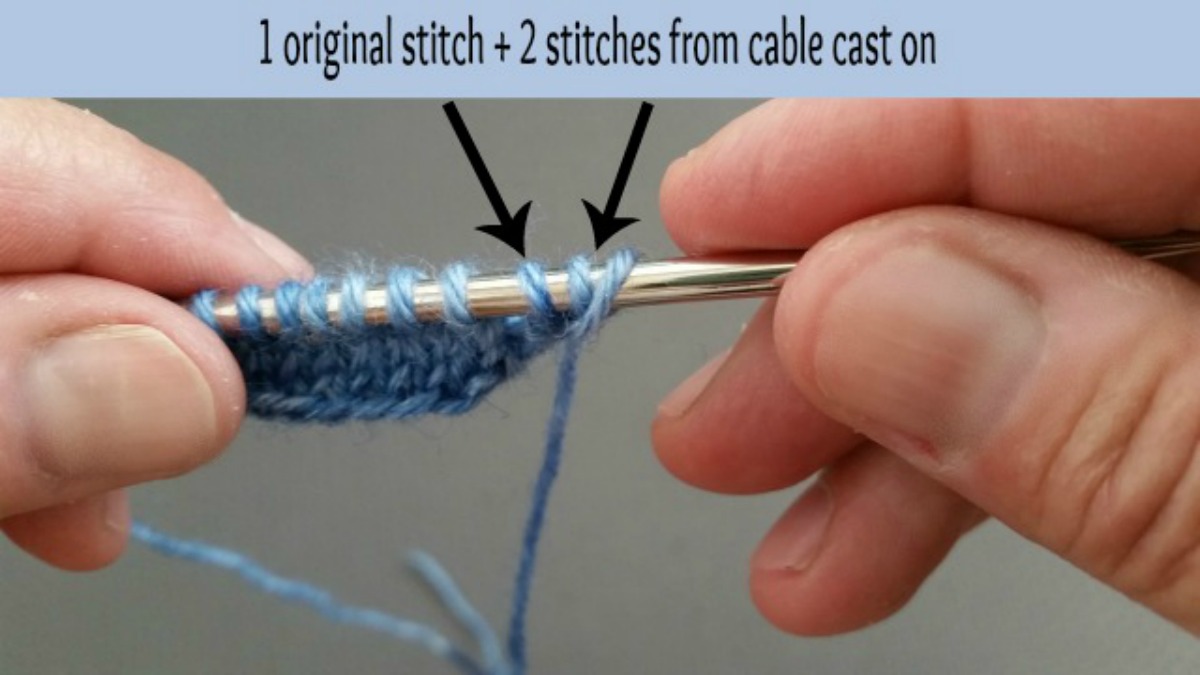
You will now have (from left to right) the original stitches followed by a gap, one original stitch + the two stitches from the cable cast on.
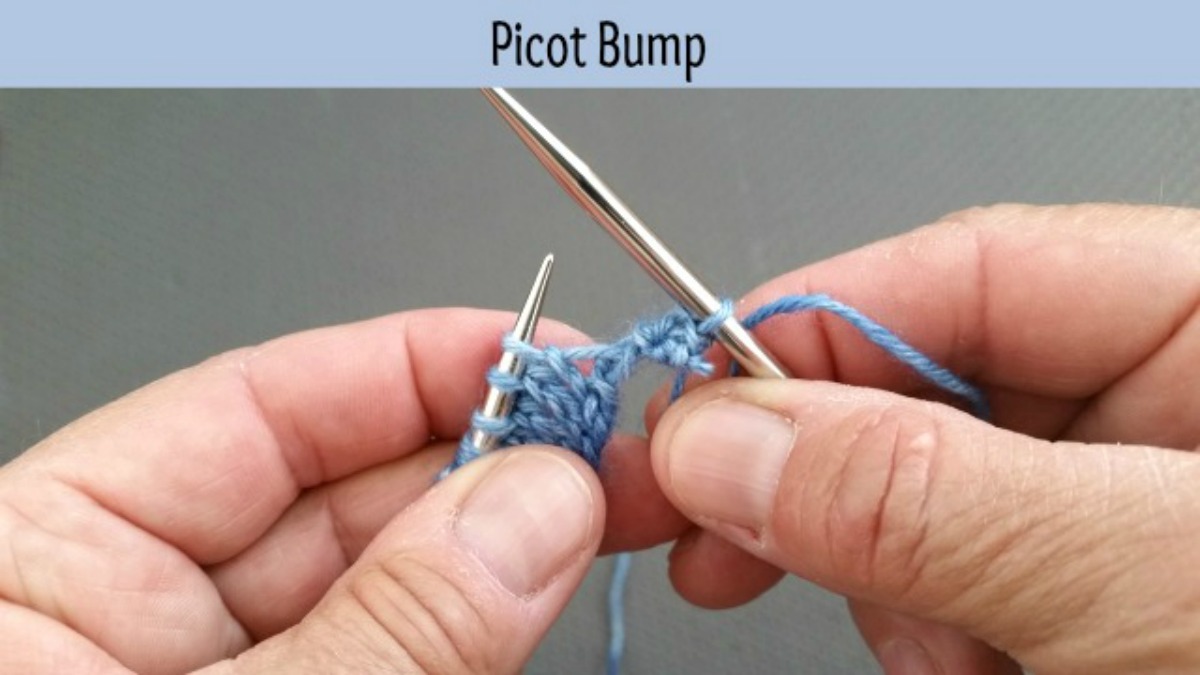
Bind off the first two stitches using a basic knit bind off. When you are done you will have one stitch on your right needle & your first Picot Bump!!
Bind off the next two stitches and they will form the space between the bumps.
You will also notice a small hole which looks like a YO directly beneath each bump, this is normal.
Slip the remaining stitch from your right needle back to your left needle, as if to purl, & start the whole process over again, from the Cable Cast On until you have no stitches left.
Blocking suggestion: When you block your finished piece, pin out each bump individually to really make them “pop”.
I hope you found this tutorial helpful. As always, I would love to hear your thoughts on it.
Until next time, Happy Trails,

[ssba-buttons]
Home
About Us
Blog
Shop Our Yarns
Shop Knitting Patterns
Contact
Connect with Us
Knitting Sites I'm Loving
Our Unraveled
Watch Barbara Knit
Very Pink Knits
Knit Picks
New Stitch a Day
Lace Knitting Stitches
Picot Bind Off
Crescent Shawl Shapes
Russian Join
Joining in the Round






I know this if off topic but I’m looking into starting
my own blog and was curious what all is needed to
get set up? I’m assuming having a blog like yours
would cost a pretty penny? I’m not very web smart so I’m not 100% positive.
Any tips or advice would be greatly appreciated. Many thanks https://qlaraskincare.net/
Hi…Happy to chat with you, why don’t you contact me off line at diana@rollingeranch.com.